Handmade Yarn Wreath Ornaments- 2010
Sunday, December 12, 2010
Rather than sending out Christmas gifts to all of our friends and family, we send out handmade ornaments. I started doing this last year , and carried on with our new found tradition this year. Its more meaningful to me. It costs less to ship. I don't catch myself playing favorites (because even though we try not to, it happens, ya know?).
This is what Christmas is all about.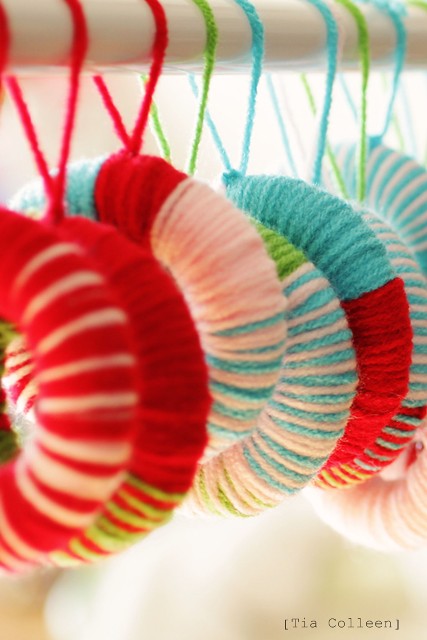
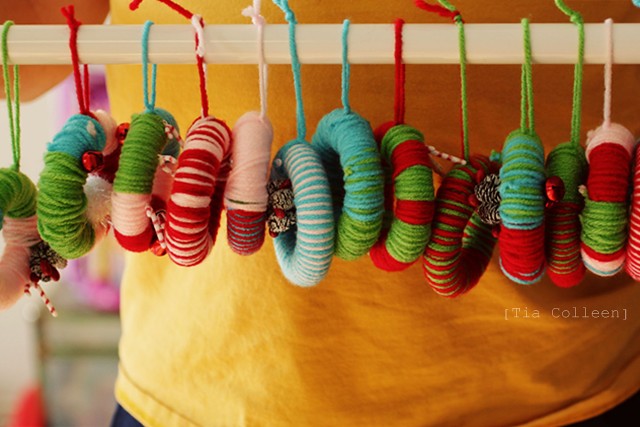
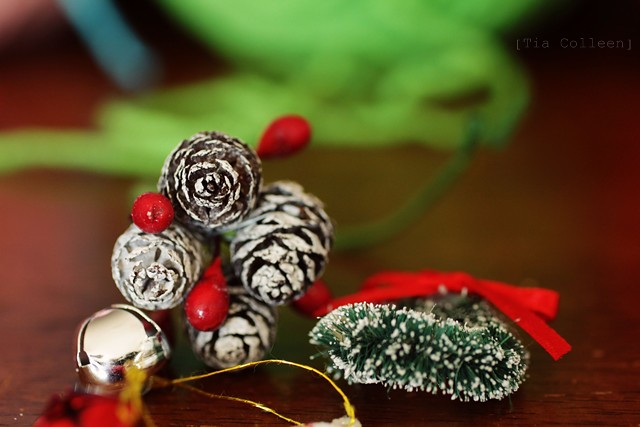
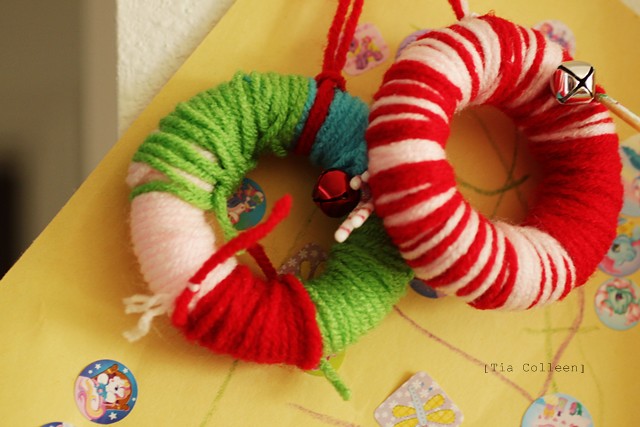
They turned out pretty cute, right? Bright, colorful, cheery-
...and easy! You guys, soooo easy.
So easy, in fact, that my 4 year old was sitting right beside me, twisting and turning the yarn faster than me!
So whatdya say? Want to make some heartfelt yarn wreath ornaments for your friends and family? Because I took a few pictures while I was making my last two, just in case y'all wanted to make some too.
And I waited until a week after sending all of mine out (hiii friends, I hope you got them and love them!), in hopes of not ruining any surprises.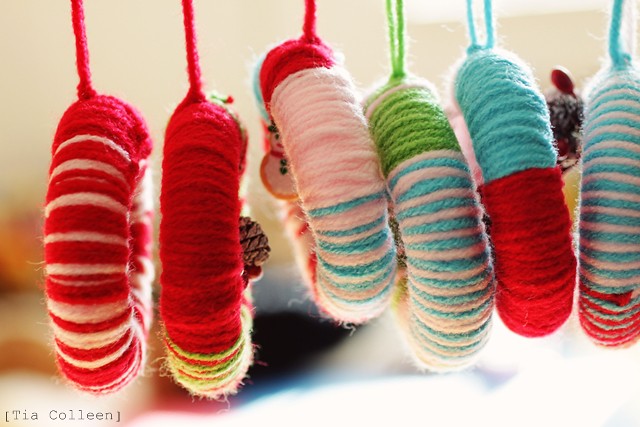
...lets make Christmas.
What you will need:
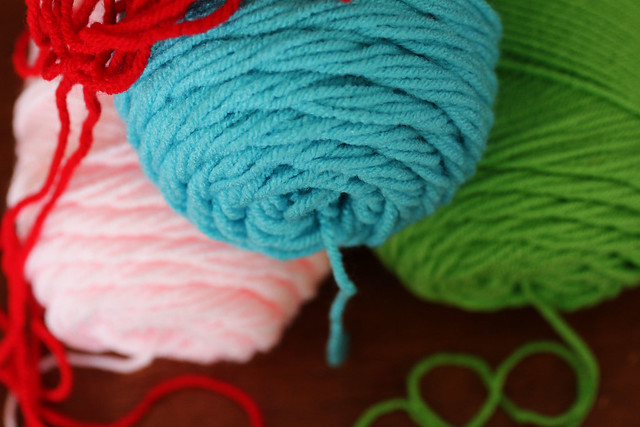
I went to Hobby Lobby and picked out 4 Christmas-ish colors that I thought would be fun to mismatch on all 30-something of my ornaments.

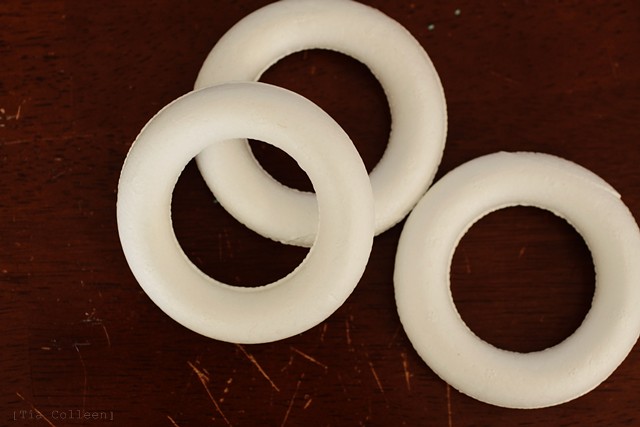
I ordered mine from here. I had looked at both Hobby Lobby and Michaels, but didn't find any that were nearly as affordable. Plus I like ordering things and then getting mail as a result :)

Awww, isn't he sweet?
It was yummy, too.
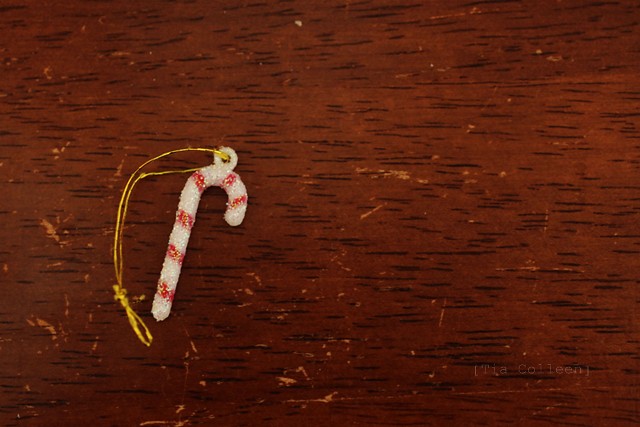

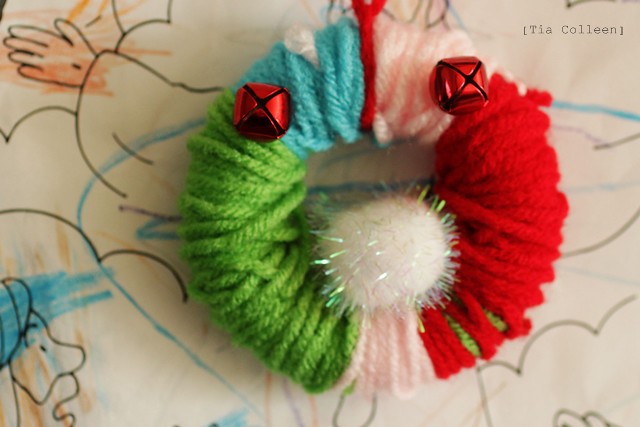
...ok those are totally optional. I did some with, and some without. The ones that I did without, were easier to wrap and send off, and took much less time to make, because- have you ever tried stringing up a jingle bell onto a piece of yarn (ya know how the end of yarn frays and is all puffy and stuff)? It wasn't my favorite part of the craft project, I'll tell ya that much.
But they sure do look cute, so, its worth it- I say.
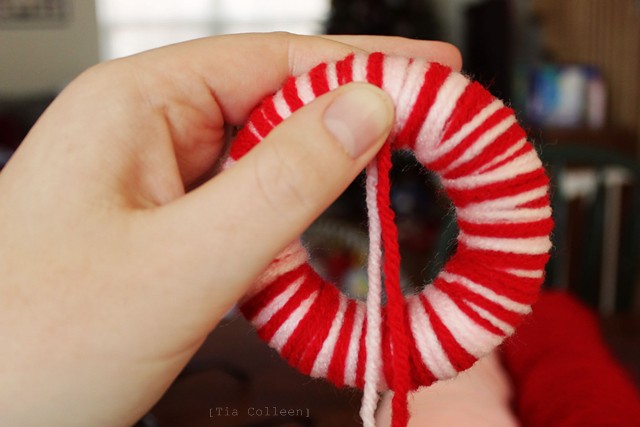
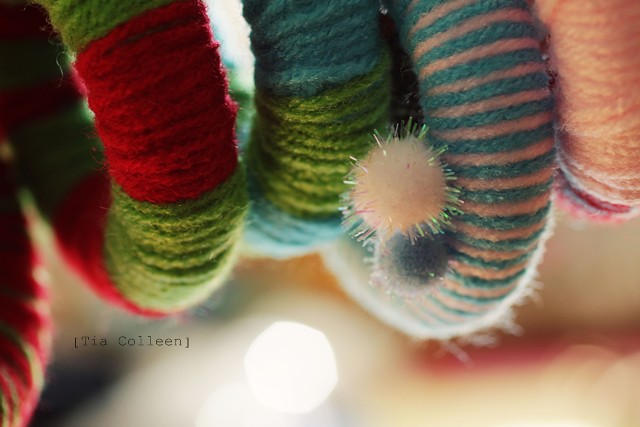
Well actually, I'm going to show you how to do two different styles. The "candy cane" style, and then a regular multi color style. Lets start with candy cane...

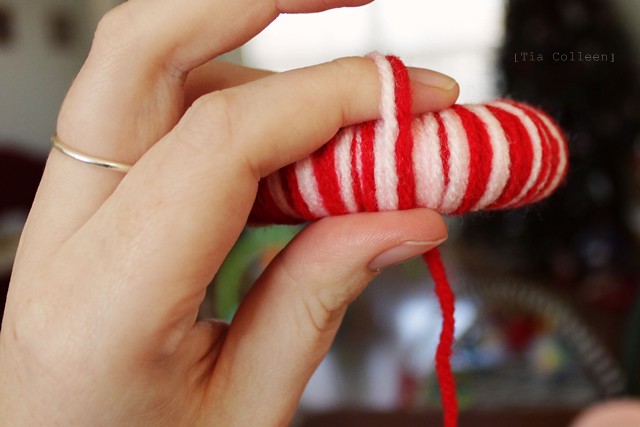
Start with 2 different colors of yarn. I chose pink and red, because together I think they look a little bit like a candy cane swirl.
So- take two different colors of yarn, put the ends together, and give the strings a good yank. About 4 arms length pulls should do it. And then cut them.

Remember, these are no-glue ornaments. I know that a lot of yarn wreaths are made using hot glue or whatever, but I'm making these with my kids- so the easier, the better.
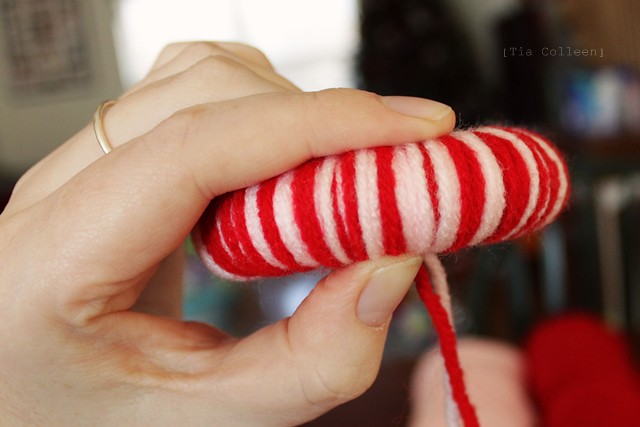
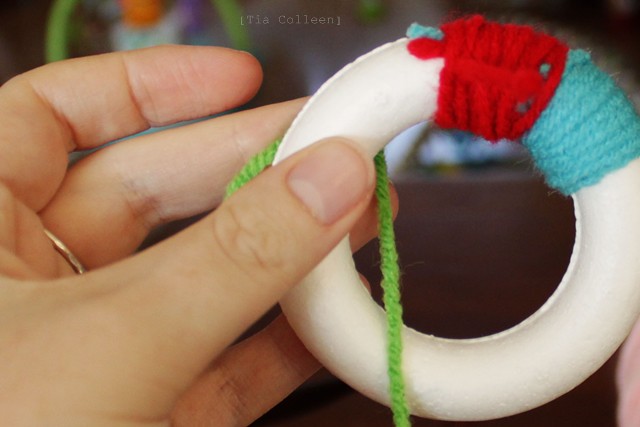
-Wrap your yarn around your styrofoam.
-Tie a knot.
Simple.
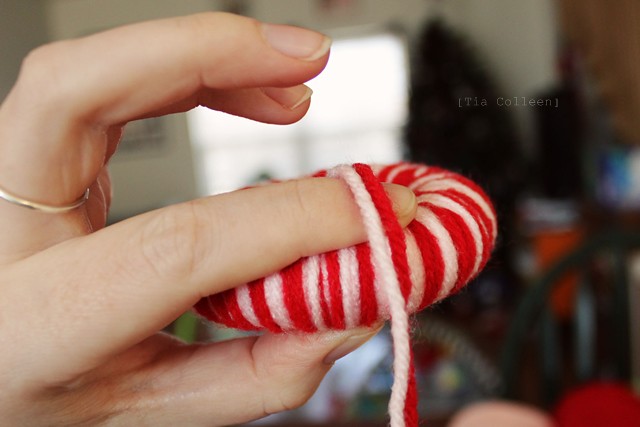
-Pull the short end of the excess string off to one side.
-Now start looping the long end of the yarn around the wreath, going in the direction that your loose ends are facing. Does that make sense?
Here, kind of like this...

See what I mean? If not, then I'm sure you can figure it out as you go. Really, all you're doing is wrapping yarn in a loop over and over again- theres really no way to mess it up.
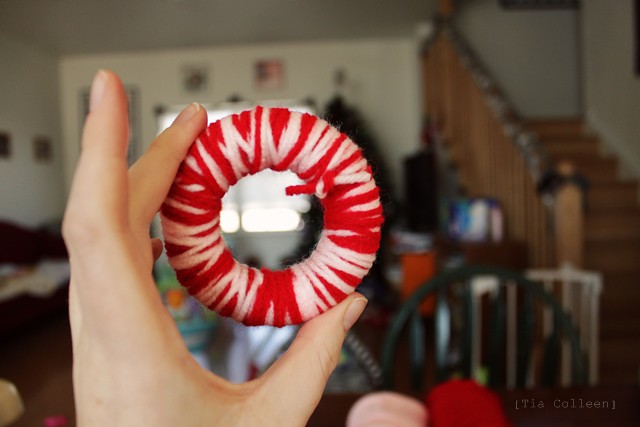
-So keep wrapping your yarn around your styrofoam. You can do a tight wrap, doing just a single layer of yarn. Or you can do a sort of messy wrap, doing layer over layer. I like the messy look, I think it looks more handmade, and its brighter and bolder from farther away.
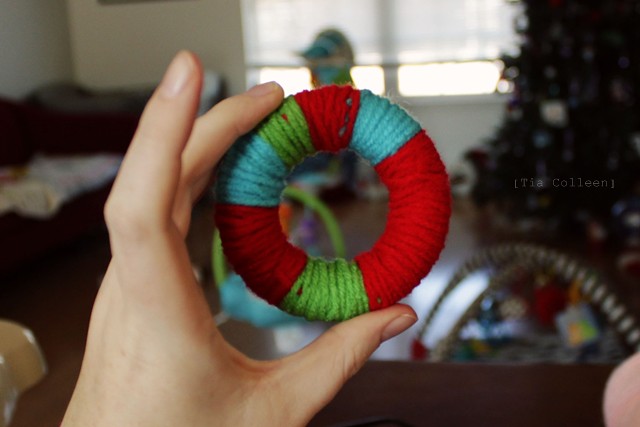
After you get all the way around, your wreath should look something like that.
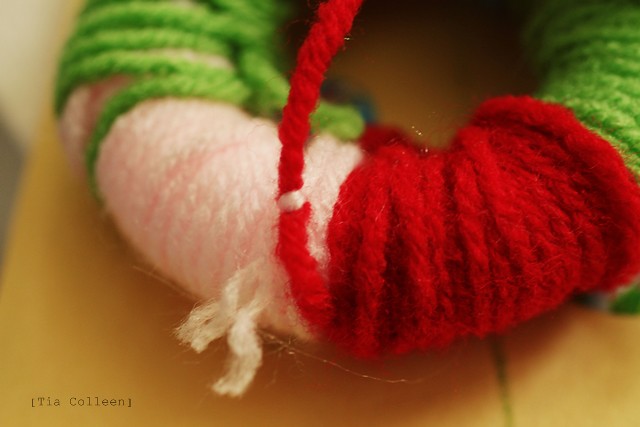
-Now tie it off.
Heres how you do that...
(even though its sort of self explanatory)
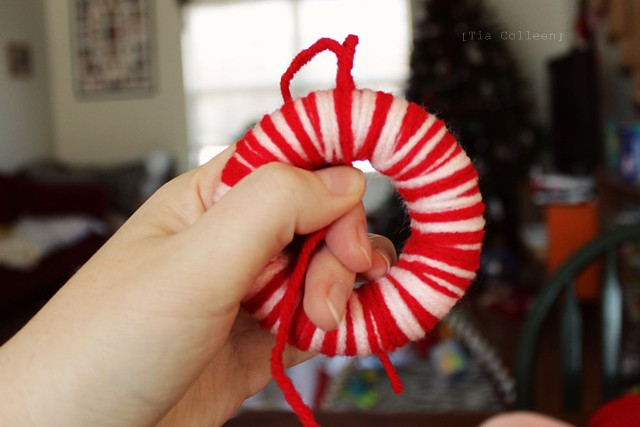
-Wherever you decide to end your wrapping, put your thumb down on the yarn, and let the excess hang down.
-Put your index finger on the back.
-With your other hand, wrap the string that was hanging down around again, up and over your index finger that you were holding in place.
-Now take that piece of string that you just wrapped around, and put your thumb on it, like in the above picture.
-Wrap the excess string around again, and then pull your index finger away (we're tying a knot here).
-Pull the excess through the loop. Pull it tight. Make sure you're doing this on the "back side" of the wreath (the side that you weren't looking at, when wrapping).

-Now cut off the excess string with a little bit to spare, and tie those pieces in a knot.
Picture on the way...
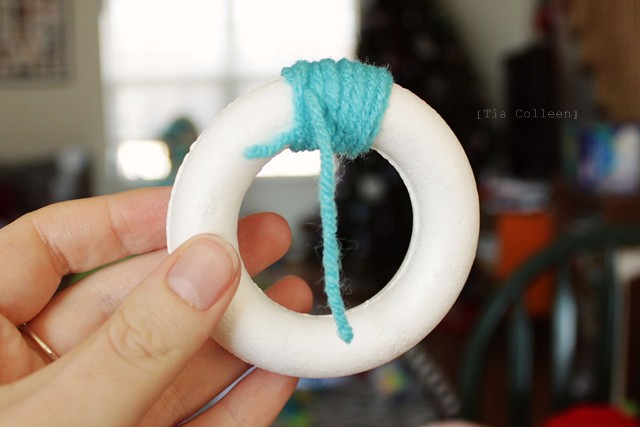
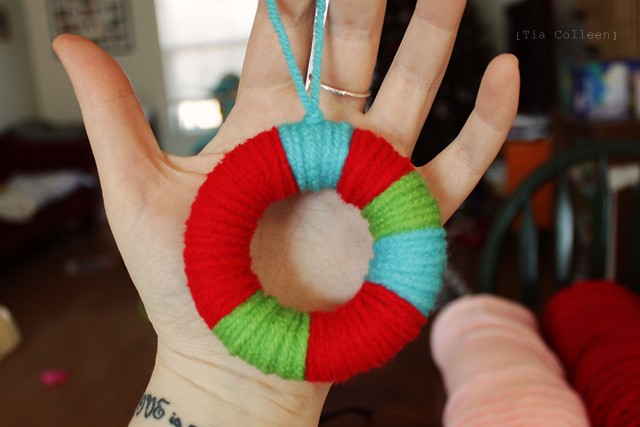
Now you need a way to hang it up!

-Cut another piece of yarn. Fold it in half. Tie a knot.
-Now tie that, around your wreath (and when you do, make sure that your knot is on the back, so you can't see it). Cut the ends-

...Okay, I realize that I could have just said "tie a knot", rather than posting 8 billion pictures describing how to do so, but... that wouldn't make for a very interesting tutorial, now would it? Haha.
But now that you get the point, I'll just post pictures for the single strand style? I'm sure you'll get the idea.

You start with one color, tie it onto the wreath, wrap the yarn to cover the area that you want covered, tie it off.
Lather rinse, repeat.
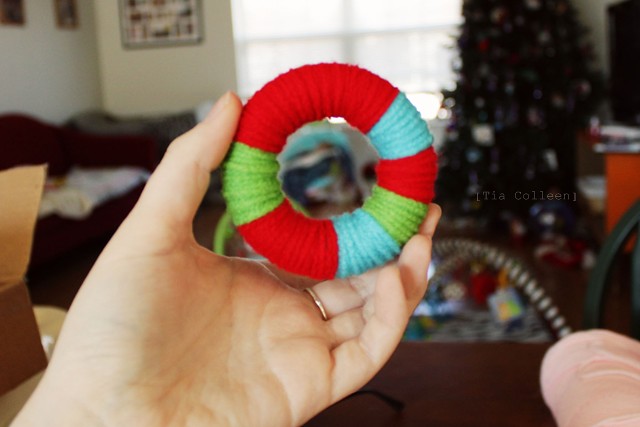
The back will look messy like this...
But the front should look a little more tidy, like this...
Tie a string on, the way that I showed you up there with the candy cane style, and-
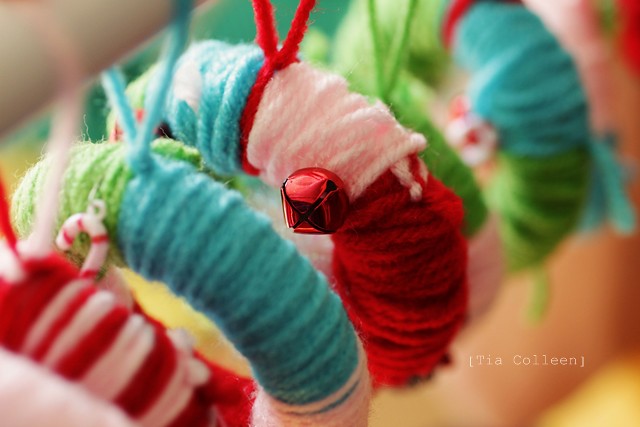
Of course, these are ones that don't have any charms on them, just yarn. If you want to string up charms along the way, just slide them onto the yarn where you want them to rest, or string the charms onto wire, loop the wire around the wreathe, and loop your yarn around the wire. Both ways work.

Not bad right? Oh my gosh, and she had so much fun. I can't even tell you. She begged me, for days and days (because with three kids to take care of, it took me weeks to finish this project), every morning and every night, to work on them.
And I think that the ones that Eleanore made, where I didn't quite trim the yarn as neatly as I would have with the ones that I made, they've got a certain kind of charm about them-
Messy and cute. Just like her (heeee).

And Christopher was a total champ, holding the broom still for me so I could take pictures of all of the finished products before I packaged them up.


And a cute way to package them- is to color some pages from a Christmas themed coloring book, and then use some of the leftover yarn to tie the coloring sheets around the wreath.
So... thats that.
Our 2010 handmade ornaments.
This is a comment-free blog, but if you have any questions, or would like to get in touch with us, our email is down there at the bottom of the page, and we'd love to hear from you :)